Bucket in AWS to receive files
This page will help you create a bucket and get the credentials, which are necessary for you to receive your CSV files with data from your integration.
Creating the bucket
-
Log in to your AWS account → https://aws.amazon.com/pt/
-
Log in to the console
-
In the search bar above, search for “Amazon S3“ and select S3 in the Services category
-
Change the AWS region in the top right corner if necessary
-
Click “Create bucket“
-
Give the bucket a name (The bucket name is unique in the global namespace).
-
At the bottom of the page, click “Create bucket“.
-
That's it, your bucket is created. Now let's go to the credentials.
-
In the top right corner, click on the name of your AWS user and then click on “Security Credentials“.
-
On the left of the page, click on “Users”, on the page that opens, click on “Create user”.
-
Give a name, for example “Grouplink“ (This user will be used by us to save files in S3).
-
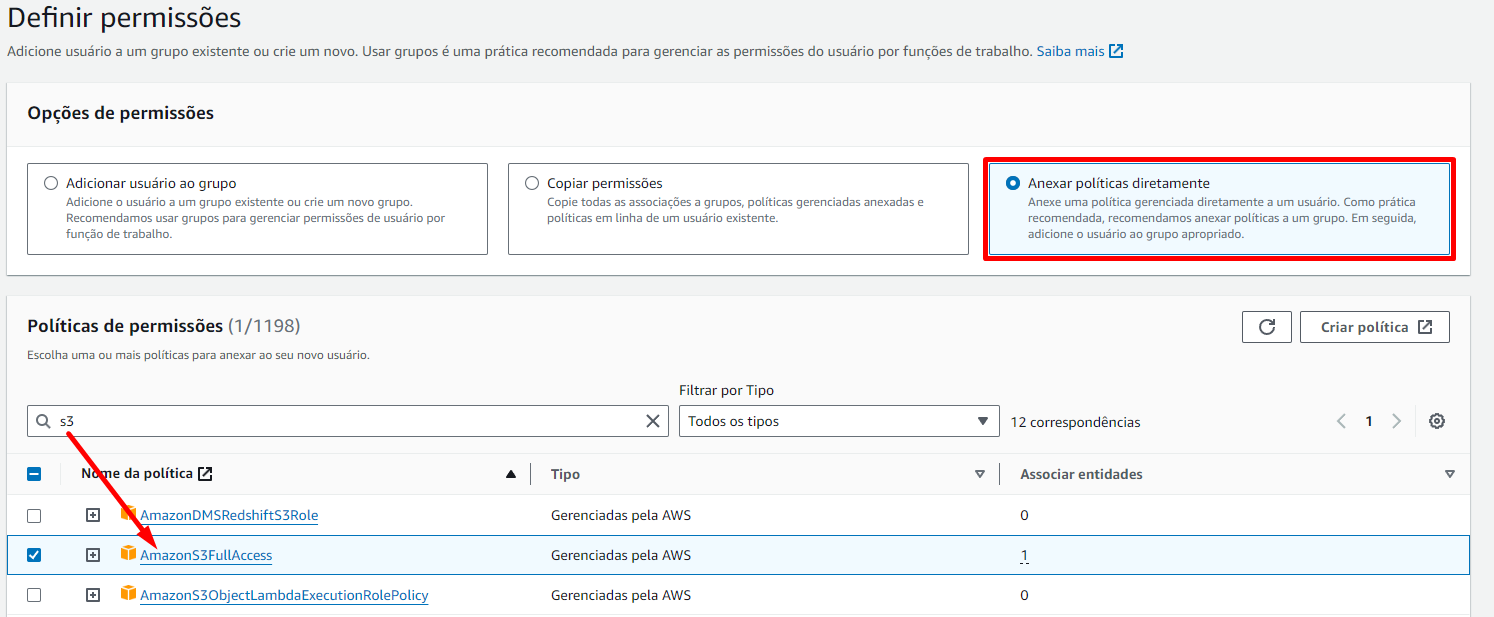
Click “next“ and under “Set permissions“ click on “Attach policies directly“.
-
Search for “s3“ and add the “AmazonS3FullAccess“ permission.
-
Click “Next” and then “Create User”.
-
In the list of users, click on the name of the user you created and go to the “Security Credentials” section.
-
In the “Access Keys” box, click on “Create Access Key”.
-
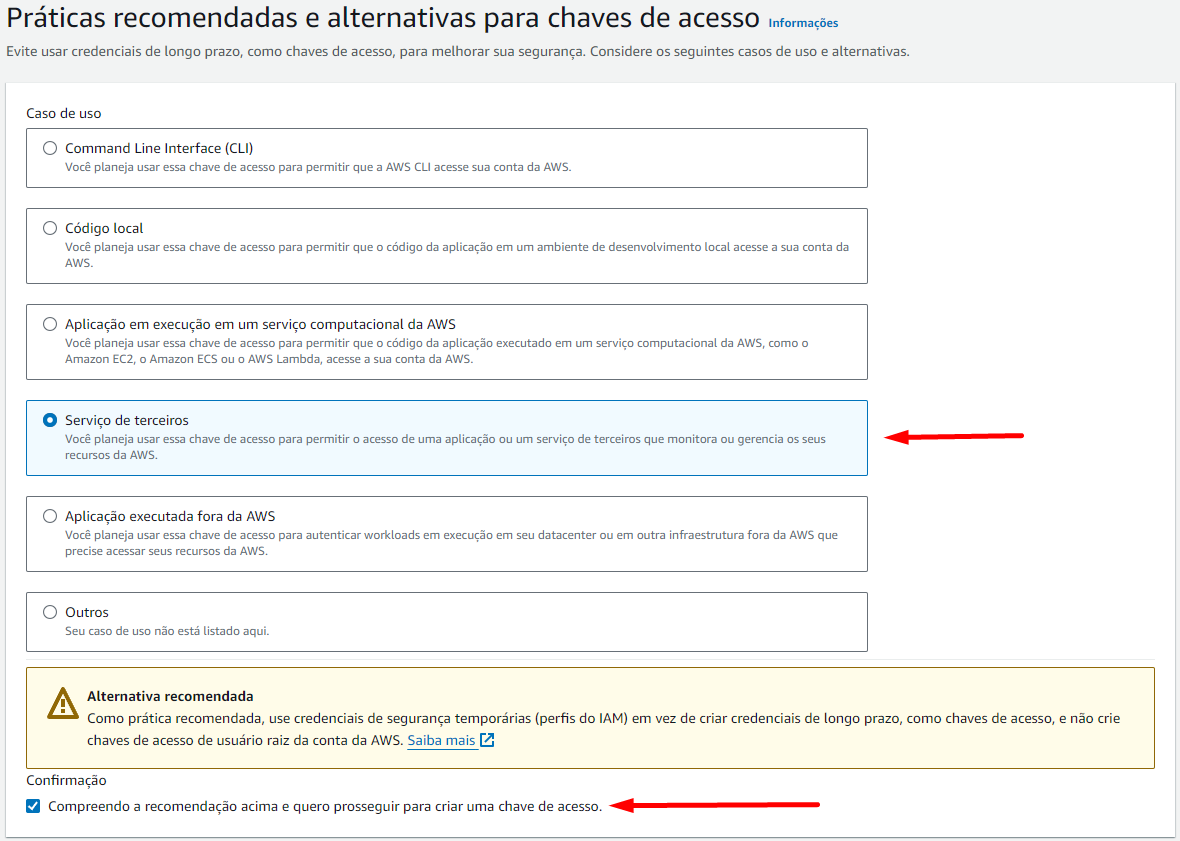
On the next page, click on “Third-Party Service” and “I understand the above recommendation”.
-
Give the description tag a name, for example “Grouplink“, and click “Create Access Key“.
-
Copy the access key and secret access key to use when creating your organization-vault.